Word tips for self-publishing authors and self-editing
- Siân Smith

- Aug 20, 2025
- 9 min read
Microsoft Word is still regarded as the industry standard for writing and editing. There’s nothing to stop you using the likes of Google docs or Apple’s Pages, but they won’t have the full capability offered by Microsoft Word.
However, it’s important to stress here that writing and editing is not the same as publishing. When it comes to formatting and getting content ready to publish, you need to remember that Microsoft Word is a word processor. So it’s top dog for writing and editing manuscripts, but it’s not what you use for creating books.
I won’t go into the entire scope of Word (I’m not writing a Word manual, after all), but I will highlight my top 4 tips that will make a real difference while you’re in draft mode.
These tips will be especially useful if you intend to work with an editor, but they will also be helpful if you’re planning on self-editing your book for self-publishing.
By the time you get to the end of this blog post, you’ll have a decent grounding in how to:
- Name your Word files
- Use Word Styles for chapter titles and subheadings
- Create a Table of Contents
- Use Track Changes
By all means pick out whichever aspect you need to brush up on. I’d certainly focus on one at a time so you don’t get too overwhelmed.
A note before we start
Let me just stress a few things before I share my tips for using Word:
- This is an overview, rather than a detailed step-by-step guide for each process, but it should be enough to cover the basics and get you started.
- I haven’t provided the differences between Mac and PC (I have used both and find there aren’t many differences).
- My Word is version xxx, so yours may look slightly different.
- All my screenshots look dark because I use Dark Mode as often as possible.
How to name and save your Word files
This goes beyond how to use the ‘Save As’ button (as I assume you already know how to do that) and is a tip that will help you keep your files (and many drafts!) organised.
The best practice for saving your files is to save a new version each day, starting the file name with that day’s date. However, forget whichever date order you would usually use (dd/mm/yy in the UK and mm/dd/yy in the US etc.) and instead use the dating format year/month/day. This means your filing system automatically presents itself with oldest to newest.
So if you were saving a file on 18 August 2025, your file name would be 250818_filename.
Saving a new version every day, with this format, is handy for two reasons:
1) If you change your mind on any changes made, you still have yesterday’s file to easily revert to or compare with.
2) If anything catastrophic happened and you lost your work due to file corruption or similar, the worst-case scenario is losing one day’s work, rather than days, weeks, or a lifetime!
Using this filing system also means you won’t end up with several file names like ‘FINAL-DRAFT’, ‘FINAL-FINAL-DRAFT’, ‘FINAL-FINAL-DRAFT-NEW-ENDING’, ‘USE-THIS-ONE-FINAL-DRAFT’. Sound familiar?
My husband is a computer programmer, where file names make a huge difference, so he taught me this back in the early 2000s, back when autosave wasn’t a feature in Word (I must have pressed ctrl + s about 20 times a day!).
Using Word Styles (to create a Table of Contents)
There are various reasons for using Word Styles in your manuscript, but the chief reason is so you can easily create a Table of Contents and make it easier to navigate your manuscript. It also automates universal changes you might want to make across your manuscript, rather than modifying each part manually.
You should definitely apply Word Styles to your chapter headings and subheadings. You can also use them for other elements in your manuscript like quotes or client stories, but I’ll just show you how to apply them to these top line elements – you can easily use them for other elements once you become more confident.
Word Styles basics
Word Styles is that part on your Word document that says ‘Normal’, ‘Heading 1’, ‘Heading 2’, etc. It’s found on the ribbon from the Home tab. Rather than selecting each chapter title in turn and changing the font each time via the font tab in Word, instead you should click on the same Heading Style each time from the Styles tab.
Use ‘Heading 1’ for your chapter titles and ‘Heading 2’ for your subheadings.

(No doubt this ribbon has always been there, you’ve just never noticed it before!)
While you’re getting used to using Styles, just use the default ones. You can play around later (this always reminds me of when I used to play with different fonts in Word back in the ’90s).
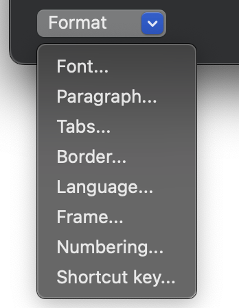
Once you feel confident to change the format of the headings, just right-click whichever one you want to update and click ‘modify’:

Basic changes can be amended on the first window:

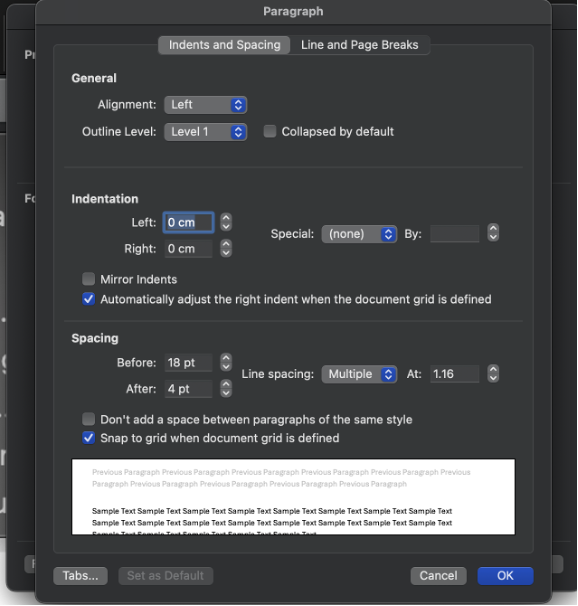
More advanced options (e.g. font and line spacing) are found under the ‘format’ dropdown:
Create a Table of Contents (using Word Styles)
Once you’ve used Headings 1 and 2 for your chapter titles and subheadings, you can use the automated Table of Contents feature in Word. Woohoo!
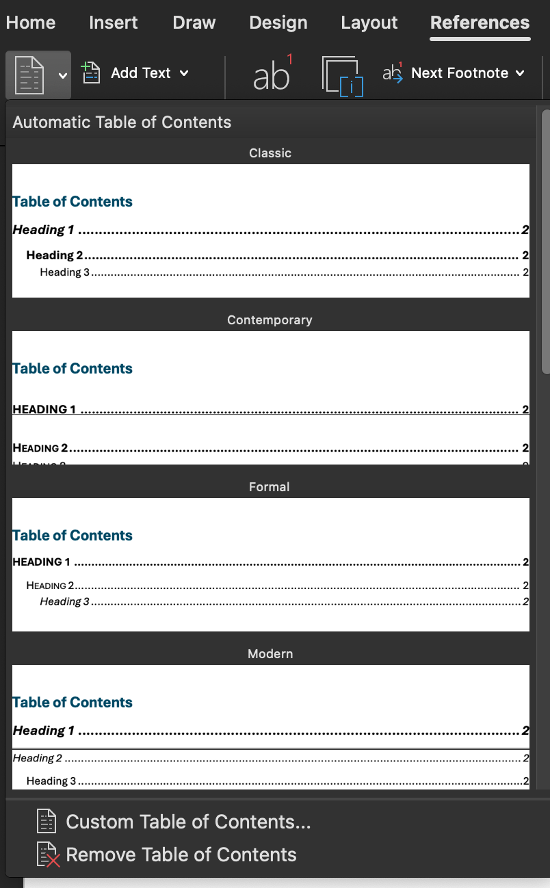
The Table of Contents can be found under the ‘References’ tab:

You can keep things simple by using the automatic Table of Contents, which uses Headings 1 to 3 as its default (meaning your subheadings will also appear in the Table of Contents). While your manuscript is in draft mode, don’t worry about exactly how much detail is in your contents page: you can manually amend your Table of Contents later.
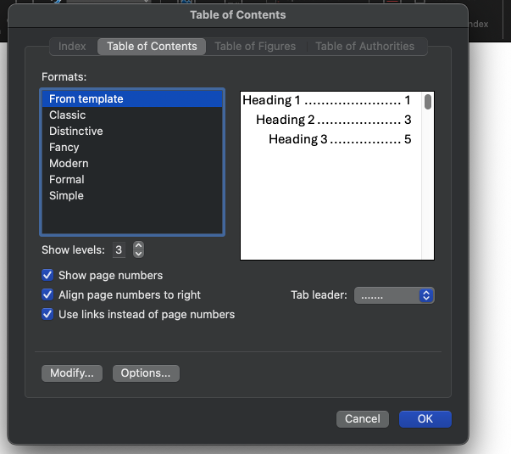
If you fancy it, use the ‘Custom Table of Contents’ to amend details such as how much appears in the Table of Contents, and how the line break appears between the text and page number (‘Tab leader’).
Once your Table of Contents is up and running, don’t forget to update it before you send it to your editor or before you create your book’s proofs. Word can update the contents page, but doesn’t do this automatically.
To update your Table of Contents, navigate to the References tab and then click on ‘Update Table’:
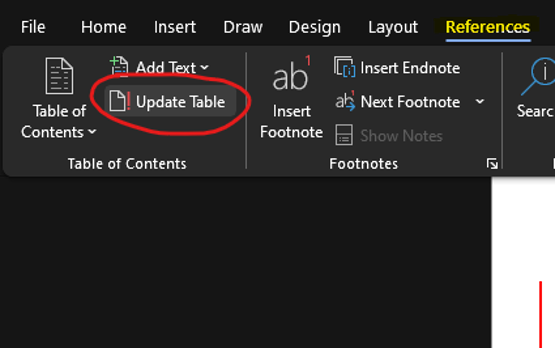
Click on this option and then the following window will appear:

‘Update page numbers only’ means just the pagination will change. ‘Update entire table’ means any changes to chapter titles or subheadings will also update (I tend to update the entire table).
Navigate your Word document with Word Styles
A bonus of using Word Styles to create a Table of Contents is it will also create a Navigation Pane in your document, so you can find and click on each chapter title or subheading, rather than endlessly scrolling through your manuscript.
You’ll find this Navigation Pane by clicking on ‘Page x of x’ in the bottom left-hand corner of your Word document:

Click on the ‘headings’ tab (mine looks like an icon for bullet points), and anything styled with Headings 1 to 3 should appear:

You can then click on each one to jump to that section of your manuscript. Magic!
Using Track Changes in Word
As with all these elements of Word, there are countless aspects you can find with Track Changes, but I’ll just cover the basics.
You should familiarise yourself with Track Changes if you intend to work with an editor (developmental editor, line editor, copyeditor, etc.), as this is how they will return your edited manuscript. However, I’d also recommend you learn how to use Track Changes if you’re self-editing so you can record the changes you make as you move from first draft to final draft.
First things first, you’ll find Track Changes under the Review tab:

Click this to track every change made as you type, delete, move text, change the formatting (use bold, italic, etc.).
Once your draft has been edited with Track Changes, there are several options for how to review these changes.
To read through the manuscript without seeing every change made, select ‘Simple Mark-up’ from the Review tab:

When you want to see what changes have been made, select All Markup from the dropdown (I don’t know why markup is spelt 2 ways):

Then you can decide how many of the changes you see at once via the ‘Show Markup’ bubbles options.
Show markup > Balloons > ‘Show Only Formatting in Balloons’ means all revisions show as deleted/inserted, with only formatting in balloons (changing font to bold, etc.).
Show markup > Balloons > ‘Show Revisions in Balloons’ means you are less likely to miss any amends, but can be overwhelming to work with if there are multiple changes per page:


‘Show All Revisions Inline’ means changes are shown within the text, rather than highlighting the change in balloons in the margin:

You can also use Track Changes to see which text has moved where. In such instances, I also use the commenting tool to indicate when text has moved or been deleted.
When text has been moved and the move has been tracked, a comment appears with ‘Moved ‘insertion’ followed by a reference number in square brackets [xx] or ‘moved up’ / ‘moved down’, depending on where the original text was and where it’s now moved to. Make sure you select ‘show revisions in balloons’ for this option.
If you see ‘Moved (insertion) [xx]’ this means text has been inserted here from another part of the book (cut and paste). Clicking on the blue arrow will take you to where this passage was originally (in my version, moved text is green).
If you see ‘moved up’ or ‘moved down’, this means the text has now moved. When you click on the blue arrow, it takes you to where this text has moved to (moved up/down):


Accepting/rejecting changes and resolving comments
Once you’ve decided the best way to view the changes made to your manuscript, you will need to reject or accept each change.
Before you starting accepting and rejecting changes, make sure you save this as a new file (using the file-naming tip from above, of course).
There are two options here:
1) Right-click on each change from the bubble or the inline change.
or
2) Use the ‘Accept’ or ‘Reject’ icon from the Review tab. From here you can ‘Accept/Reject’ or ‘Accept/Reject and Move to Next’.


If you choose to ‘Move to Next’, this will jump you forwards to the next change, rather than being able to stay on the page and continue reading the text.
Once you are happy you have accepted or rejected every change, you can ensure all other Track Changes are removed by clicking ‘Accept All Changes and Stop Tracking’, but only do this right at the end, because every single change will be accepted!

Resolving comments
Comments are different to changes. Comments are text boxes I add to certain words, sentences, or paragraphs to raise attention to specific queries, to inform you of my reason for a change, or for when I want to tell you how much I enjoyed what I just read!

Use the ellipsis icon in the comment box to delete or resolve the comment.

- ‘Resolve’ means the comment is marked as ‘resolved’ so you know it doesn’t require any action
- ‘Deleting’ the comment means the comment is deleted and can’t be accessed, so as above with accepting all changes, only do this once you are sure you no longer need it.
Commenting tip: Use the commenting ribbon to ensure you haven’t missed any comments, but only once you have read through the whole manuscript at least once, as this is more of a tidy-up process at the end of going through all the changes.

You can also use the commenting tool to leave a note to yourself or your editor. You might want to leave a note-to-self if you want to add some references to a point you’re making, you want to re-write a paragraph at some point, or even add a whole section that you don’t have the brainpower for yet!
To add a comment, simply highlight the text the comment is relevant to and then click ‘New Comment’, under the Review tab. This could be a single word or a couple of paragraphs. If your comment applies to a whole chapter or section between subheadings, just highlight the chapter title or subheading and leave your comment on there.


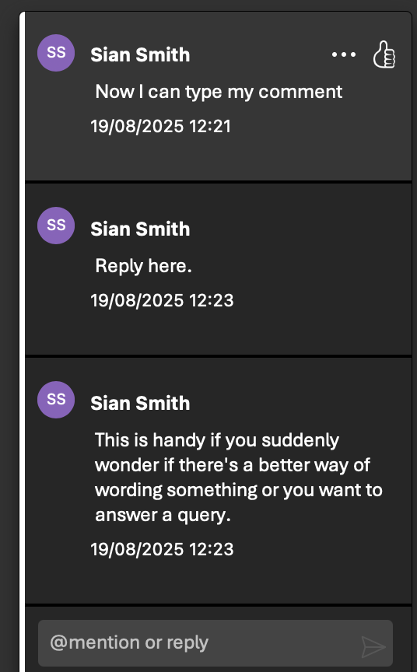
Make sure you press the ‘send’ arrow or command/ctrl + Enter (depending on Mac vs PC) to attach the comment to the text.
Use the ellipsis icon to edit your comment.
Type in the text both in the same commenting box to reply to your own comment or anyone else’s comment. This is handy for answering questions or if you have later thoughts about a query or question previously posed.
Right, I’d better stop there as I said this wasn’t going to turn into a Word manual…
That should be enough to get you started, help you feel more organised, boost your confidence when it comes to working with an editor or self-editing, and save a fair bit of time!
I’d love to know if there are any elements in this quick guide that you’d like me to cover in more details or if there are any other aspects of Word you’d like me to help you with.
Comment below or send me a quick email!
And don’t forget to share this post if you found any part of it helpful.


Comments